Particles are essentially 2D images rendered in 3D space. They are primarily used for effects such as smoke, fire, water droplets, or leaves. A Particle System is made up of three separate Components: Particle Emitter, Particle Animator, and a Particle Renderer. You can use a Particle Emitter and Renderer together if you want static particles. The Particle Animator will move particles in different directions and change colors. You also have access to each individual particle in a particle system via scripting, so you can create your own unique behaviors that way if you choose. Please view the Particle Scripting Reference here.
The remainder of this page's text is from the Particle Component Reference pages.
Particle Components
Particle Systems
Particle Systems in Unity are used to make clouds of smoke, steam, fire and other atmospheric effects. Particle Systems work by using one or two Textures & drawing them many times, creating a chaotic effect.

A Particle System included in the Standard Assets A typical Particle System in Unity is an object that contains a Particle Emitter, a Particle Animator and a Particle Renderer. The Particle Emitter generates the particles, the Particle Animator moves them over time, and the Particle Renderer draws them on the screen.
If you want your particles to interact with the world, add a Particle Collider Component to the GameObject.
Ellipsoid Particle Emitter
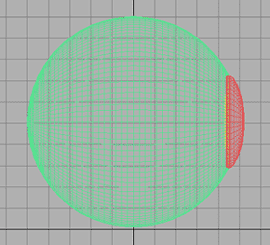
The Ellipsoid Particle Emitter spawns particles inside a sphere. Use the Ellipsoid property below to scale & stretch the sphere.

The Ellipsoid Particle Emitter Inspector
Properties
| Emit | If enabled, the emitter will emit particles. |
| Min Size | The minimum size each particle can be at the time when it is spawned. |
| Max Size | The maximum size each particle can be at the time when it is spawned. |
| Min Energy | The minimum lifetime of each particle, measured in seconds. |
| Max Energy | The maximum lifetime of each particle, measured in seconds. |
| Min Emission | The minimum number of particles that will be spawned every second. |
| Max Emission | The maximum number of particles that will be spawned every second. |
| World Velocity | The starting speed of particles in world space, along X, Y, and Z. |
| Local Velocity | The starting speed of particles along X, Y, and Z, measured in the object's orientation. |
| Rnd Velocity | A random speed along X, Y, and Z that is added to the velocity. |
| Emitter Velocity Scale | The amount of the emitter's speed that the particles inherit. |
| Tangent Velocity | The starting speed of particles along X, Y, and Z, across the Emitter's surface. |
| Simulate In World Space | If enabled, the particles don't move when the emitter moves. If false, when you move the emitter, the particles follow it around. |
| One Shot | If enabled, the particle numbers specified by min & max emission is spawned all at once. If disabled, the particles are generated in a long stream. |
| Ellipsoid | Scale of the sphere along X, Y, and Z that the particles are spawned inside. |
| MinEmitterRange | Determines an empty area in the center of the sphere - use this to make particles appear on the edge of the sphere. |
Details
Ellipsoid Particle Emitters (EPEs) are the basic emitter, and are included when you choose to add a Particle System to your scene from . You can define the boundaries for the particles to be spawned, and give the particles an initial velocity. From here, use the Particle Animator to manipulate how your particles will change over time to achieve interesting effects.
Particle Emitters work in conjunction with Particle Animators and Particle Renderers to create, manipulate, and display Particle Systems. All three Components must be present on an object before the particles will behave correctly. When particles are being emitted, all different velocities are added together to create the final velocity.
Spawning Properties
Spawning properties like Size, Energy, Emission, and Velocity will give your particle system distinct personality when trying to achieve different effects. Having a small Size could simulate fireflies or stars in the sky. A large Size could simulate dust clouds in a musky old building.
Energy and Emission will control how long your particles remain onscreen and how many particles can appear at any one time. For example, a rocket might have high Emission to simulate density of smoke, and high Energy to simulate the slow dispersion of smoke into the air.
Velocity will control how your particles move. You might want to change your Velocity in scripting to achieve interesting effects, or if you want to simulate a constant effect like wind, set your X and Z Velocity to make your particles blow away.
Simulate in World Space
If this is disabled, the position of each individual particle will always translate relative to the Position of the emitter. When the emitter moves, the particles will move along with it. If you have Simulate in World Space enabled, particles will not be affected by the translation of the emitter. For example, if you have a fireball that is spurting flames that rise, the flames will be spawned and float up in space as the fireball gets further away. If Simulate in World Space is disabled, those same flames will move across the screen along with the fireball.
Emitter Velocity Scale
This property will only apply if Simulate in World Space is enabled.
If this property is set to 1, the particles will inherit the exact translation of the emitter at the time they are spawned. If it is set to 2, the particles will inherit double the emitter's translation when they are spawned. 3 is triple the translation, etc.
One Shot
One Shot emitters will create all particles within the Emission property all at once, and cease to emit particles over time. Here are some examples of different particle system uses with One Shot Enabled or Disabled:
Enabled:
- Explosion
- Water splash
- Magic spell
Disabled:
- Gun barrel smoke
- Wind effect
- Waterfall
Min Emitter Range
The Min Emitter Range determines the depth within the ellipsoid that particles can be spawned. Setting it to 0 will allow particles to spawn anywhere from the center core of the ellipsoid to the outer-most range. Setting it to 1 will restrict spawn locations to the outer-most range of the ellipsoid.

Min Emitter Range of 0

Min Emitter Range of 1
Hints
- Be careful of using many large particles. This can seriously hinder performance on low-level machines. Always try to use the minimum number of particles to attain an effect.
- The Emit property works in conjunction with the AutoDestruct property of the Particle Animator. Through scripting, you can cease the emitter from emitting, and then AutoDestruct will automatically destroy the Particle System and the GameObject it is attached to.
Mesh Particle Emitter
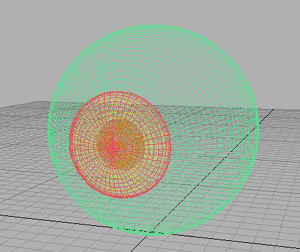
The Mesh Particle Emitter emits particles around a mesh. Particles are spawned from the surface of the mesh, which can be necessary when you want to make your particles interact in a complex way with objects.

The Mesh Particle Emitter Inspector
Properties
| Emit | If enabled, the emitter will emit particles. |
| Min Size | The minimum size each particle can be at the time when it is spawned. |
| Max Size | The maximum size each particle can be at the time when it is spawned. |
| Min Energy | The minimum lifetime of each particle, measured in seconds. |
| Max Energy | The maximum lifetime of each particle, measured in seconds. |
| Min Emission | The minimum number of particles that will be spawned every second. |
| Max Emission | The maximum number of particles that will be spawned every second. |
| World Velocity | The starting speed of particles in world space, along X, Y, and Z. |
| Local Velocity | The starting speed of particles along X, Y, and Z, measured in the object's orientation. |
| Rnd Velocity | A random speed along X, Y, and Z that is added to the velocity. |
| Emitter Velocity Scale | The amount of the emitter's speed that the particles inherit. |
| Tangent Velocity | The starting speed of particles along X, Y, and Z, across the Emitter's surface. |
| Simulate In World Space | If enabled, the particles don't move when the emitter moves. If false, when you move the emitter, the particles follow it around. |
| One Shot | If enabled, the particle numbers specified by min & max emission is spawned all at once. If disabled, the particles are generated in a long stream. |
| Interpolate Triangles | If enabled, particles are spawned all over the mesh's surface. If disabled, particles are only spawned from the mesh's vertrices. |
| Systematic | If enabled, particles are spawned in the order of the vertices defined in the mesh. Although you seldom have direct control over vertex order in meshes, most 3D modelling applications have a very systematic setup when using primitives. It is important that the mesh contains no faces in order for this to work. |
| Min Normal Velocity | Minimum amount that particles are thrown away from the mesh. |
| Max Normal Velocity | Maximum amount that particles are thrown away from the mesh. |
Details
Mesh Particle Emitters (MPEs) are used when you want more precise control over the spawn position & directions than the simpler Ellipsoid Particle Emitter gives you. They can be used for making advanced effects.
MPEs work by emitting particles at the vertices of the attached mesh. Therefore, the areas of your mesh that are more dense with polygons will be more dense with particle emission.
Particle Emitters work in conjunction with Particle Animators and Particle Renderers to create, manipulate, and display Particle Systems. All three Components must be present on an object before the particles will behave correctly. When particles are being emitted, all different velocities are added together to create the final velocity.
Spawning Properties
Spawning properties like Size, Energy, Emission, and Velocity will give your particle system distinct personality when trying to achieve different effects. Having a small Size could simulate fireflies or stars in the sky. A large Size could simulate dust clouds in a musky old building.
Energy and Emission will control how long your particles remain onscreen and how many particles can appear at any one time. For example, a rocket might have high Emission to simulate density of smoke, and high Energy to simulate the slow dispersion of smoke into the air.
Velocity will control how your particles move. You might want to change your Velocity in scripting to achieve interesting effects, or if you want to simulate a constant effect like wind, set your X and Z Velocity to make your particles blow away.
Simulate in World Space
If this is disabled, the position of each individual particle will always translate relative to the Position of the emitter. When the emitter moves, the particles will move along with it. If you have Simulate in World Space enabled, particles will not be affected by the translation of the emitter. For example, if you have a fireball that is spurting flames that rise, the flames will be spawned and float up in space as the fireball gets further away. If Simulate in World Space is disabled, those same flames will move across the screen along with the fireball.
Emitter Velocity Scale
This property will only apply if Simulate in World Space is enabled.
If this property is set to 1, the particles will inherit the exact translation of the emitter at the time they are spawned. If it is set to 2, the particles will inherit double the emitter's translation when they are spawned. 3 is triple the translation, etc.
One Shot
One Shot emitters will create all particles within the Emission property all at once, and cease to emit particles over time. Here are some examples of different particle system uses with One Shot Enabled or Disabled:
Enabled:
- Explosion
- Water splash
- Magic spell
Disabled:
- Gun barrel smoke
- Wind effect
- Waterfall
Interpolate Triangles
Enabling your emitter to Interpolate Triangles will allow particles to be spawned between the mesh's vertices. This option is off by default, so particles will only be spawned at the vertices.

A sphere with Interpolate Triangles off (the default) Enabling this option will spawn particles on and in-between vertices, essentially all over the mesh's surface (seen below).

A sphere with Interpolate Triangles on It bears repeating that even with Interpolate Triangles enabled, particles will still be denser in areas of your mesh that are more dense with polygons.
Systematic
Enabling Systematic will cause your particles to be spawned in your mesh's vertex order. The vertex order is set by your 3D modeling application.

An MPE attached to a sphere with Systematic enabled
Normal Velocity
Normal Velocity controls the speed at which particles are emitted along the normal from where they are spawned.
For example, create a Mesh Particle System, use a cube mesh as the emitter, enable Interpolate Triangles, and set Normal Velocity Min and Max to 1. You will now see the particles emit from the faces of the cube in a straight line.
See Also
Hints
- Be careful of using many large particles. This can seriously hinder performance on low-level machines. Always try to use the minimum number of particles to attain an effect.
- The Emit property works in conjunction with the AutoDestruct property of the Particle Animator. Through scripting, you can cease the emitter from emitting, and then AutoDestruct will automatically destroy the Particle System and the GameObject it is attached to.
- MPEs can also be used to make glow from a lot of lamps placed in a scene. Simply make a mesh with one vertex in the center of each lamp, and build an MPE from that with a halo material. Great for evil sci-fi worlds.
Particle Animator
Particle Animators move your particles over time, you use them to apply wind, drag & color cycling to your particle systems.

The Particle Animator Inspector
Properties
| Does Animate Color | If enabled, particles cycle their color over their lifetime. |
| Color Animation | The 5 colors particles go through. All particles cycle over this - if some have a shorter life span than others, they will animate faster. |
| World Rotation Axis | An optional world-space axis the particles rotate around. Use this to make advanced spell effects or give caustic bubbles some life. |
| Local Rotation Axis | An optional local-space axis the particles rotate around. Use this to make advanced spell effects or give caustic bubbles some life. |
| Size Grow | Use this to make particles grow in size over their lifetime. As randomized forces will spread your particles out, it is often nice to make them grow in size so they don't fall apart. Use this to make smoke rise upwards, to simulate wind, etc. |
| Rnd Force | A random force added to particles every frame. Use this to make smoke become more alive. |
| Force | The force being applied every frame to the particles, measure relative to the world. |
| Damping | How much particles are slowed every frame. A value of 1 gives no damping, while less makes them slow down. |
| Autodestruct | If enabled, the GameObject attached to the Particle Animator will be destroyed when all particles disappear. |
Details
Particle Animators allow your particle systems to be dynamic. They allow you to change the color of your particles, apply forces and rotation, and choose to destroy them when they are finished emitting. For more information about Particle Systems, reference Mesh Particle Emitters, Ellipsoid Particle Emitters, and Particle Renderers.
Animating Color
If you would like your particles to change colors or fade in/out, enable them to Animate Color and specify the colors for the cycle. Any particle system that animates color will cycle through the 5 colors you choose. The speed at which they cycle will be determined by the Emitter's Energy value.
If you want your particles to fade in rather than instantly appear, set your first or last color to have a low Alpha value.

An Animating Color Particle System
Rotation Axes
Setting values in either the Local or World Rotation Axes will cause all spawned particles to rotate around the indicated axis (with the Transform's position as the center). The greater the value is entered on one of these axes, the faster the rotation will be.
Setting values in the Local Axes will cause the rotating particles to adjust their rotation as the Transform's rotation changes, to match its local axes.
Setting values in the World Axes will cause the particles' rotation to be consistent, regardless of the Transform's rotation.
Forces & Damping
You use force to make particles accelerate in the direction specified by the force.
Damping can be used to decelerate or accelerate without changing their direction:
- A value of 1 means no Damping is applied, the particles will not slow down or accelerate.
- A value of 0 means particles will stop immediately.
- A value of 2 means particles will double their speed every second.
Destroying GameObjects attached to Particles
You can destroy the Particle System and any attached GameObject by enabling the AutoDestruct property. For example, if you have an oil drum, you can attach a Particle System that has Emit disabled and AutoDestruct enabled. On collision, you enable the Particle Emitter. The explosion will occur and after it is over, the Particle System and the oil drum will be destroyed and removed from the scene.
Note that automatic destruction takes effect only after some particles have been emitted. The precise rules for when the object is destroyed when AutoDestruct is on:
- If there have been some particles emitted already, but all of them are dead now, or
- If the emitter did have Emit on at some point, but now Emit is off.
Hints
- Use the Color Animation to make your particles fade in & out over their lifetime - otherwise, you will get nasty-looking pops.
- Use the Rotation Axes to make whirlpool-like swirly motions.
Particle Collider
The World Particle Collider is used to collide particles against other Colliders in the scene.

A Particle System colliding with a Mesh Collider
Properties
| Bounce Factor | Particles can be accelerated or slowed down when they collide against other objects. This factor is similar to the Particle Animator's Damping property. |
| Collision Energy Loss | Amount of energy (in seconds) a particle should lose when colliding. If the energy goes below 0, the particle is killed. |
| Min Kill Velocity | If a particle's Velocity drops below Min Kill Velocity because of a collision, it will be eliminated. |
| Collides with | Which Layers the particle will collide against. |
| Send Collision Message | If enabled, every particle sends out a collision message that you can catch through scripting. |
Details
To create a Particle System with Particle Collider:
- Create a Particle System using
- Add the Particle Collider using
Messaging
If Send Collision Message is enabled, any particles that are in a collision will send the message OnParticleCollision() to both the particle's GameObject and the GameObject the particle collided with.
Hints
- Send Collision Message can be used to simulate bullets and apply damage on impact.
- Particle Collision Detection is slow when used with a lot of particles. Use Particle Collision Detection wisely.
- Message sending introduces a large overhead and shouldn't be used for normal Particle Systems.
Particle Renderer
The Particle Renderer renders the Particle System on screen.

The Particle Renderer Inspector
Properties
| Materials | Reference to a list of Materials that will be displayed in the position of each individual particle. |
| Camera Velocity Scale | The amount of stretching that is applied to the Particles based on Camera movement. |
| Stretch Particles | Determines how the particles are rendered. |
| Billboard | The particles are rendered as if facing the camera. |
| Stretched | The particles are facing the direction they are moving. |
| SortedBillboard | The particles are sorted by depth. Use this when using a blending material. |
| VerticalBillboard | All particles are aligned flat along the X/Z axes. |
| HorizontalBillboard | All particles are aligned flat along the X/Y axes. |
| Length Scale | If Stretch Particles is set to Stretched, this value determines how long the particles are in their direction of motion. |
| Velocity Scale | If Stretch Particles is set to Stretched, this value determines the rate at which particles will be stretched, based on their movement speed. |
| UV Animation | If either of these are set, the UV coordinates of the particles will be generated for use with a tile animated texture. See the section on Animated Textures below. |
| X Tile | Number of frames located across the X axis. |
| Y Tile | Number of frames located across the Y axis. |
| Cycles | How many times to loop the animation sequence. |
Details
Particle Renderers are required for any Particle Systems to be displayed on the screen.

A Particle Renderer makes the Gunship's engine exhaust appear on the screen
Choosing a Material
When setting up a Particle Renderer it is very important to use an appropriate material and shader. Most of the time you want to use a Material with one of the built-in Particle Shaders. There are some premade materials in the folder.
Creating a new material is easy:
- Select from the menu bar.
- The Material has a shader popup, choose one of the shaders in the Particles group. Eg. .
- Now assign a Texture. The different shaders use the alpha channel of the textures slightly differently, but most of the time a value of black will make it invisible and white in the alpha channel will display it on screen.
Distorting particles
By default particles are rendered billboarded. That is simple square sprites. This is good for smoke and explosions and most other particle effects.
Particles can be made to either stretch with the velocity. This is useful for sparks, lightning or laser beams. Length Scale and Velocity Scale affects how long the stretched particle will be.
Sorted Billboard can be used to make all particles sort by depth. Sometimes this is necessary, mostly when using particle shaders. This can be expensive and should only be used if it really makes a quality difference when rendering.
Animated textures
Particle Systems can be rendered with an animated tile texture. To use this feature, make the texture out of a grid of images. As the particles go through their life cycle, they will cycle through the images. This is good for adding more life to your particles, or making small rotating debris pieces.
source:----------------------------------------------
http://unity3d.com/support/documentation/Manual/Particle%20Systems.html


