
__________________________________
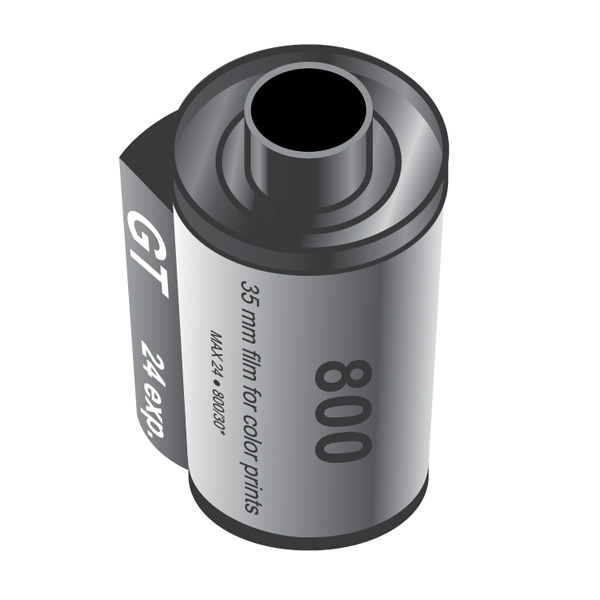
Final Image Preview
Below is the final image we will be working towards. Want access to the full Vector Source files and downloadable copies of every tutorial, including this one? Join Vector Plus for just 9$ a month.
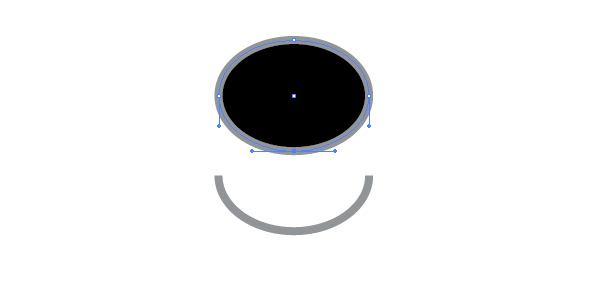
Step 1
Create an ellipse, fill it with black and give it a stroke of 4 points with a gray color (K=50). Select the bottom anchor point of the ellipse with the Direct Selection Tool, copy and paste in front and delete the fill.
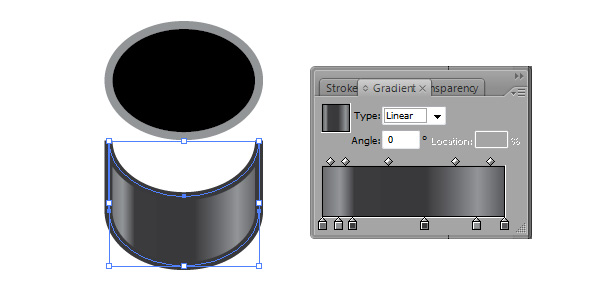
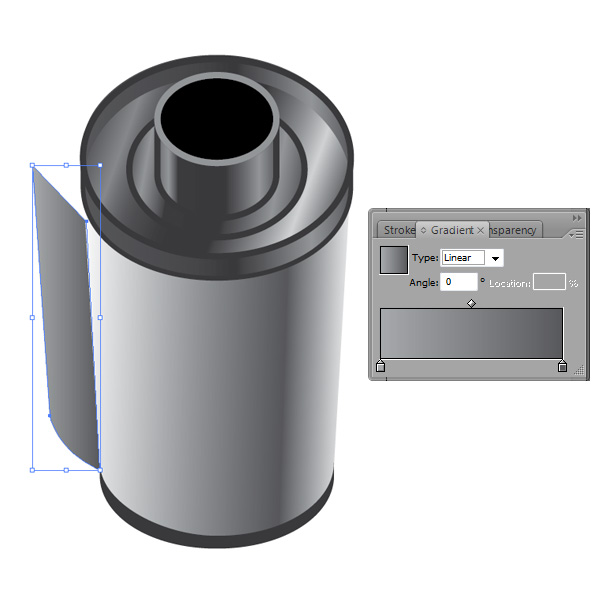
Use the half-ellipse shape to draw the rest of the cylinder, shown in the second image below. Give it a 4 pt stroke and color of dark gray (K=90). Now apply a linear gradient fill, as shown below. Move the bottom shape up until you form a cylinder. The colors of the gradient are various shades of gray (from left to right: K=70, K=50, K=90, K=90, K=50, and K=80).
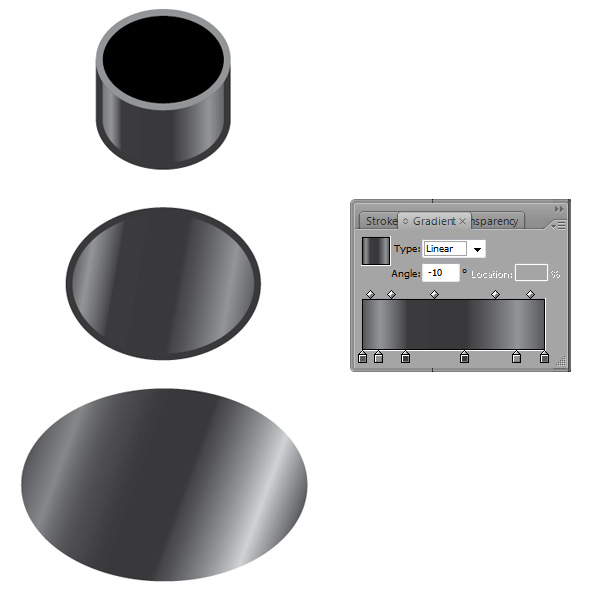
Step 2
Next, create two more ellipses. For the first one use dark gray stroke color (K=90), and apply the same radial gradient, but this time set the angle at -10 degrees.
Make the second ellipse bigger, no stroke, the same radial gradient again, and set at -20 degrees. Move both ellipses up and align them in the proper order. Now we have the first part of the top of the film roll. The colors of the gradient are various shades of gray (from left to right: K=80, K=50, K=90, K=90, K=50, and K=90).
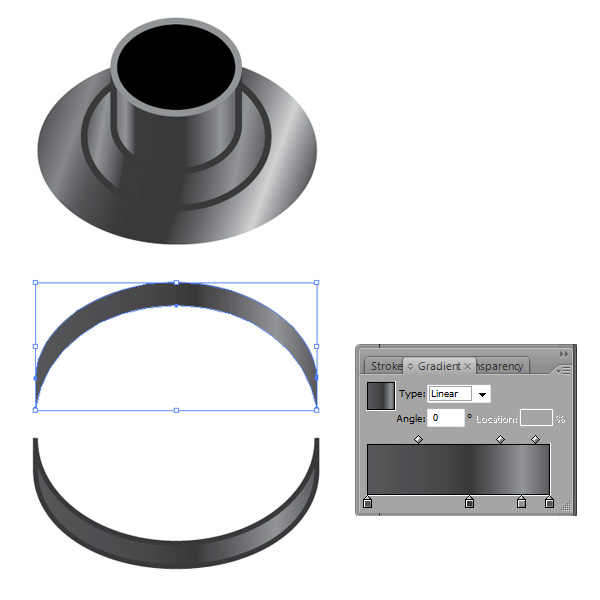
Step 3
Use the Pen and Ellipse Tools to create two identical crescent shapes. Rotate the bottom one to 180 degrees. Apply a radial gradient again to both of them, and give a stroke to the bottom one, again dark gray (K=90), this time 3 points. The colors of the gradient are various shades of gray (from left to right: K=80, K=90, K=50, and K=80).
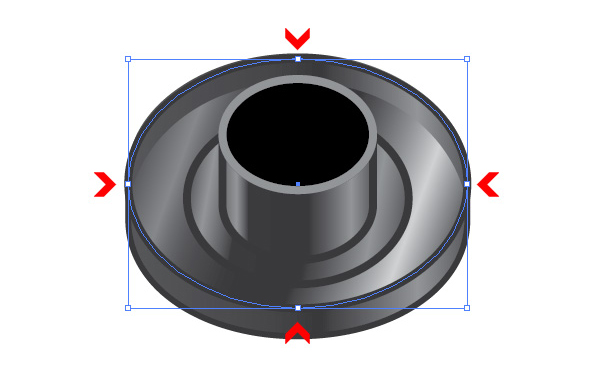
Step 4
Send both shapes To Back and move them up, until they fit under the cylinder and the two ellipses, as shown below. One final detail to complete the top of the film roll - another ellipse with no fill, stroke of 4 pts, and a gray color (K=90). Adjust the ellipse with the Selection Tool by dragging each anchor point and match it with its counterpart of both crescent shapes below. Your final piece should look like the image below.
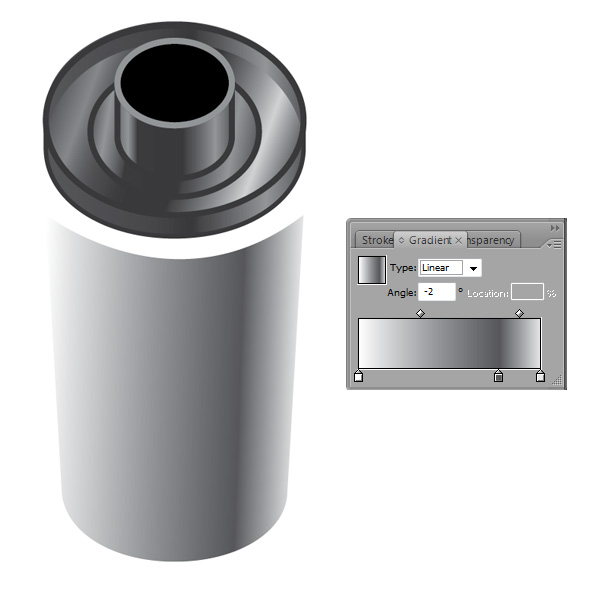
Step 5
Let's move on to the bottom part of the film roll. Ready your Pen Tool and draw a shape similar to the one shown in the image below. No stroke, radial gradient fill with gray colors (left to right: K=0, K=80, and K=10). Set the gradient to -2 degrees to give it some perspective. Send to back and move below the other shapes.
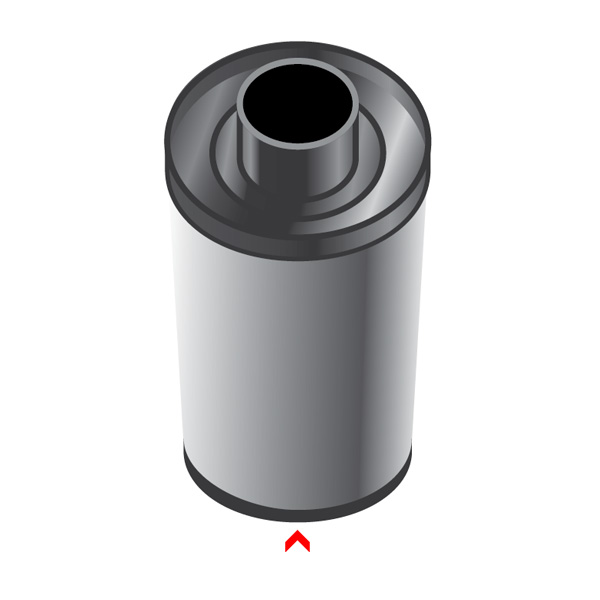
Step 6
Draw another crescent shape (or copy and tweak one of those previously created) and place it underneath the roll body. Apply a fill of dark gray (K=90) and no stroke.
Step 7
Now, we need to draw the elements where the film comes out. Select the Pen Tool and start drawing until you have something similar to the shape below. Apply q radial gradient with gray colors (left to right: K=40 and K=80) and no stroke.
Step 8
Continue with the second element. It has to be on top of the previous one. Again, no stroke and fill of dark gray (K=90).

Step 9
We are almost ready. The last thing we have to do is add some text. I used the standard Arial font. For the "35mm film" line I rotate the text at 90 degrees and applied a Shear transformation (Object > Transform > Shear). Set the angle at 25 degrees and for axis choose Vertical.
For the "Max 24" line, I repeated the shear, but entered 10. I applied it right after I used it on "35 mm" and since the tool is smart, it already sheared it to 25 degrees, so I applied 10 more to the total of 35 degrees. Repeat the same to "GT... 24 exp." with total shear of 45 degrees. For "800" I used the shear transform again, but this time I gave it negative vertical shear of about -5 to -10.
Conclusion
This wraps up this tutorial on creating a vector film roll drawn in perspective. Remember that all the shapes remain editable until the end and you can tweak and change strokes, colors and gradients until you're satisfied with the look of the illustration. You can always try different colors of the film roll body.
source:tutorialized.com